If it’s stupid but it works, it isn’t stupid.– Engineer’s Creed (apocryphal)
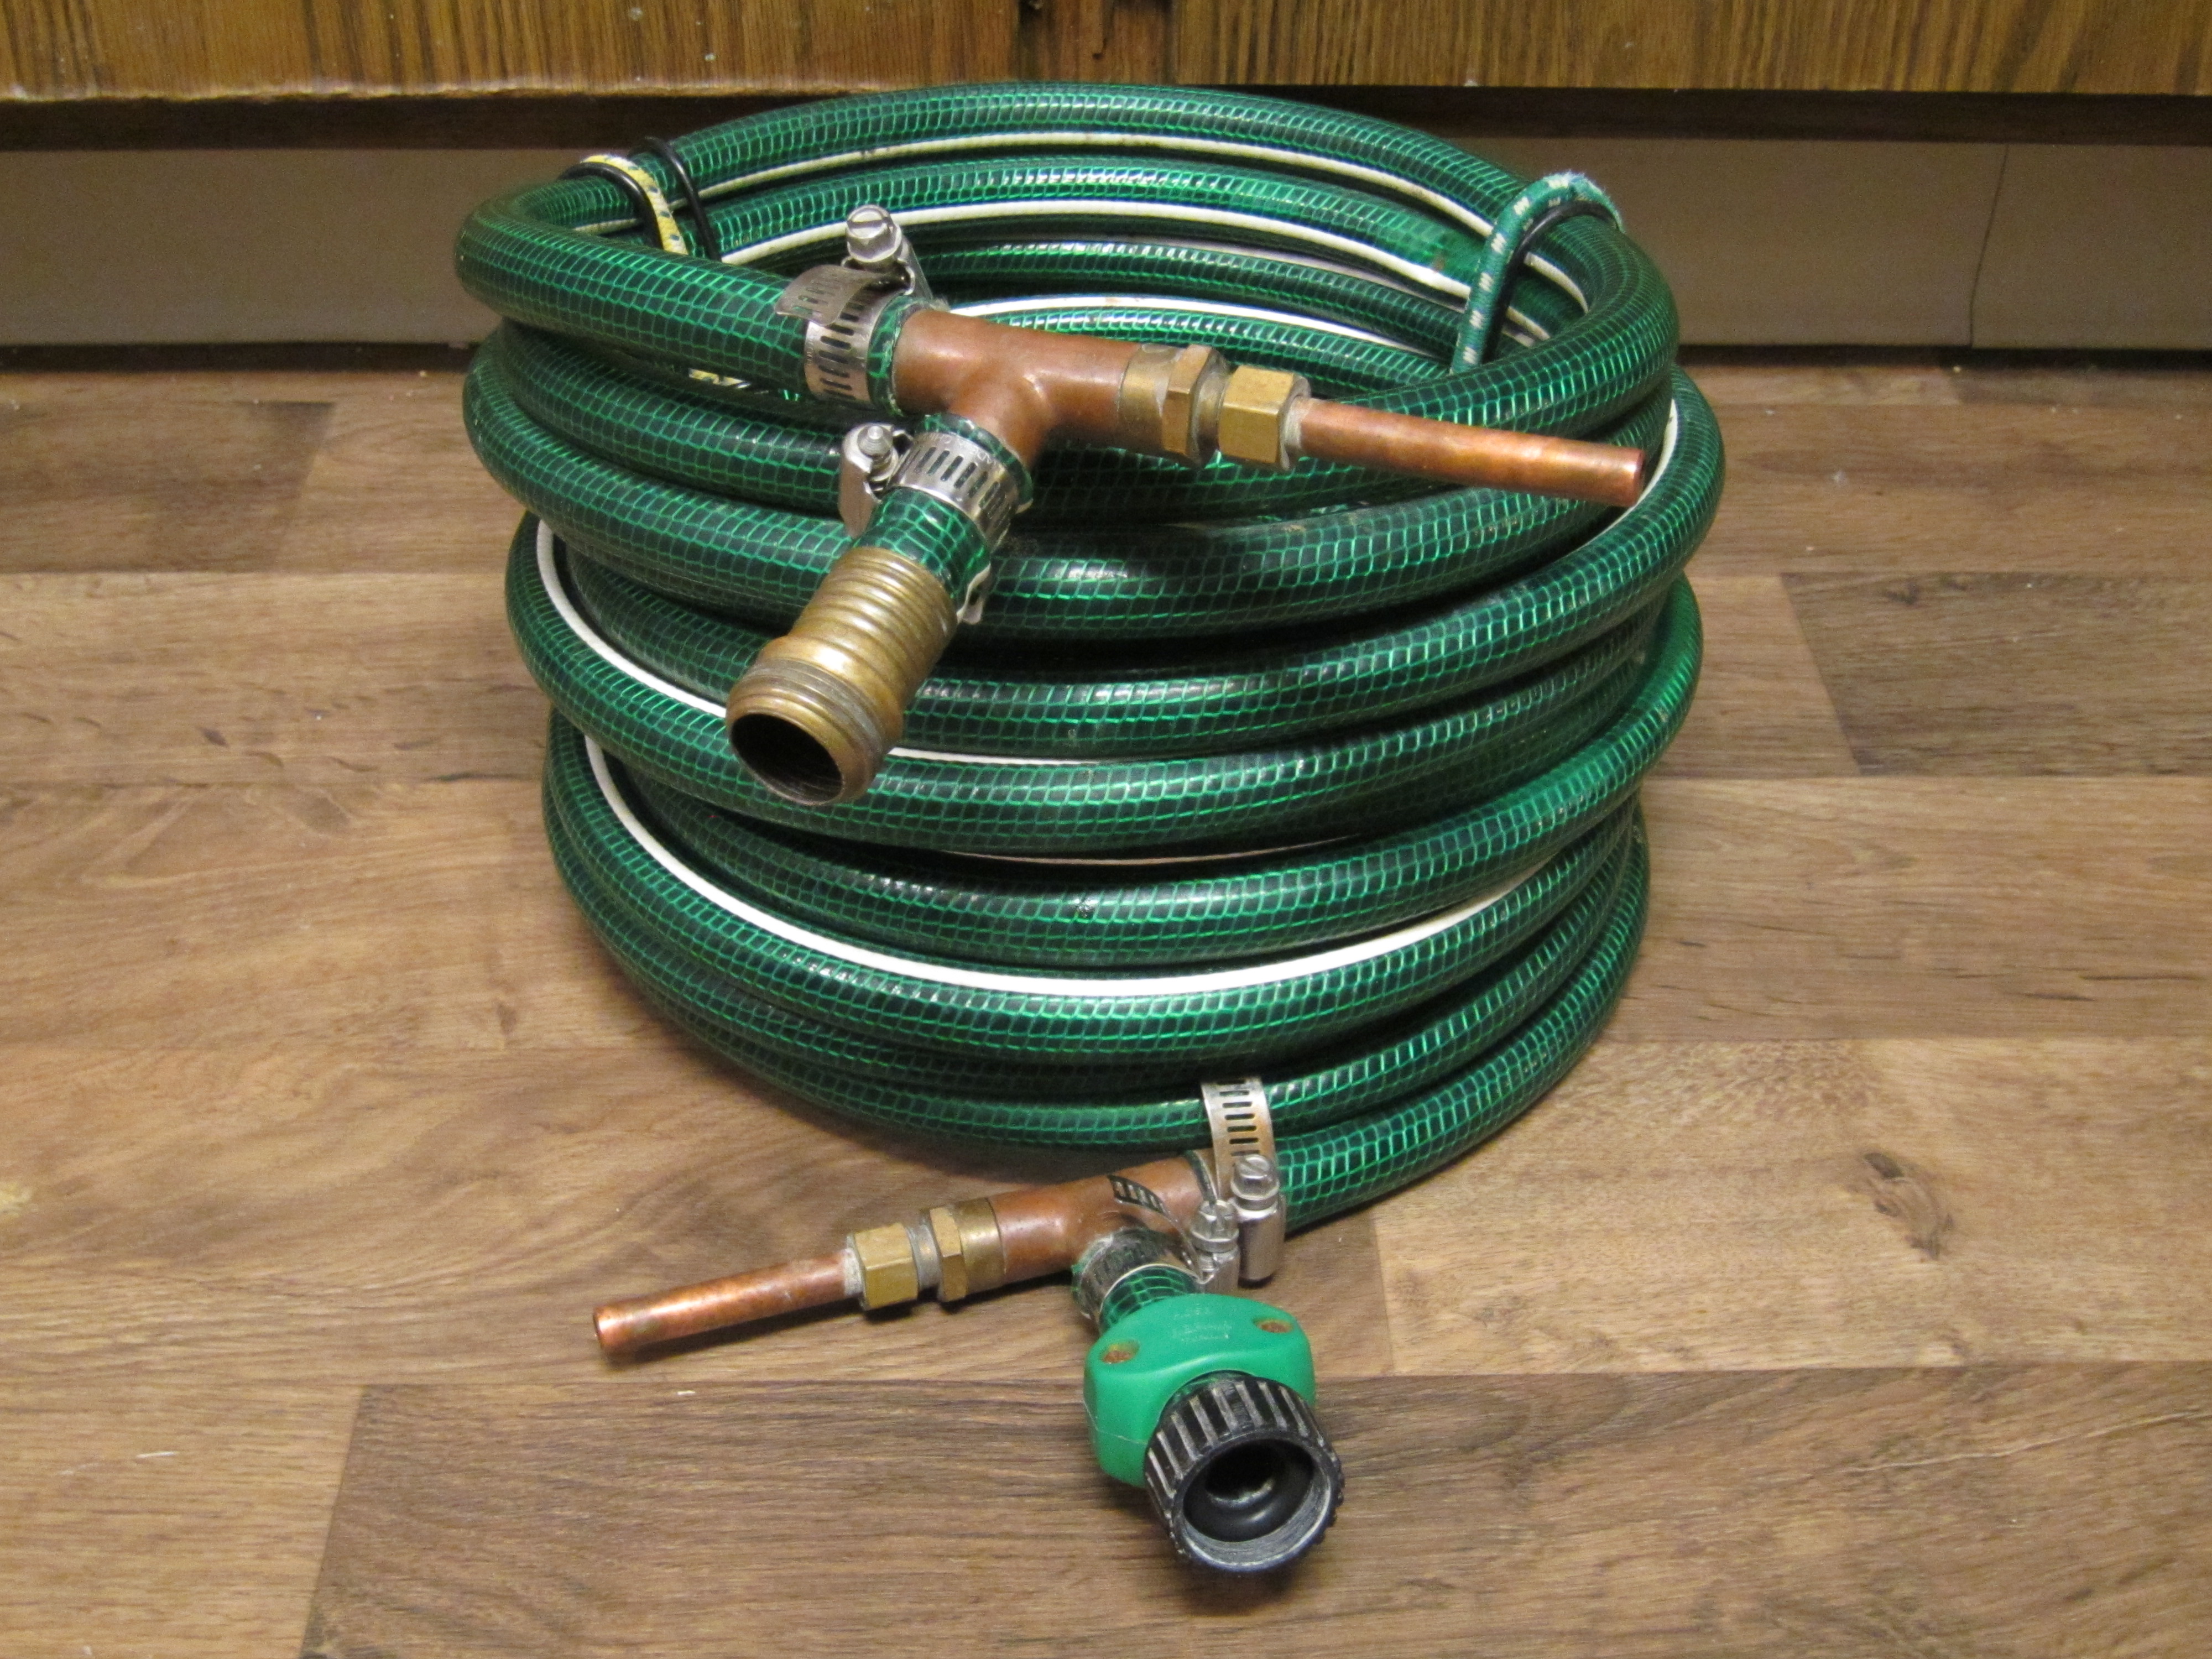

I’ve finally checked the last two items off my home brewing bucket list, replacing all my cold-side hardware with stainless steel. This definitely falls under the category of “luxury” upgrades for a home setup, but as I transition into more and more half-barrel (15.5 US gal) pilot batches, I wanted a bit more peace of mind regarding sanitation, with the ability to use brewery chemicals (chlorinated caustic, e.g.) down the road. The first half of that equation was swapping out the nearly-200-batches young plastic pump head for an all-stainless model, which was exactly as eventful as it sounds; sourcing a replacement for the even older copper tubing-and-garden hose counterflow chiller proved a bit more difficult.
In the professional brewing realm, the de facto solution would be a plate-and-frame heat exchanger, a collection of contoured stainless steel plates sealed together with gaskets, using the compression force provided by a fixed frame and set of bolts. By virtue of the bolts, the entire assembly can be broken down for visual inspection. When it comes to heat exchange, though, surface area is the name of the game, and what gives plate chillers their ungodly surface area is their multitudinous nooks and crannies. From my time working in breweries, I know just how prone those nooks and crannies are to accumulating crud — that being the brewing term of art, of course. Plate chillers are also marketed to home brewers; there are “Cadillac” options, of course, as well as more DIY-oriented offerings. But they all rely on the same basic construction, brazing stainless steel plates together with copper seams. So from a chemical resistance — and therefore, at least potentially, a sanitation — standpoint, there’s little to recommend them over a copper heat exchanger. And unlike their big cousins, the brazing approach means that the chiller can’t be broken down for cleaning or inspection.
At least for my personal sensibilities, the apparent solution was a tube heat exchanger along the lines of my (soon to be) old copper unit. And yet somehow my searches turned up only two commercial models, either of which makes some compromises: active lengths are either 12 or 18 ft, so performance would likely be inferior to my existing CFC, and I would have to use either 5/8″ (needlessly large) or threaded (needlessly unsanitary) wort connections. I just wanted a stainless steel replacement for my existing chiller, and apparently such a thing doesn’t exist.
So, reluctantly-but-not-really, we embark on yet another installment of “Sean Buys a Perfectly Good Commercial Product and Starts Cutting Holes in It”.
Parts List
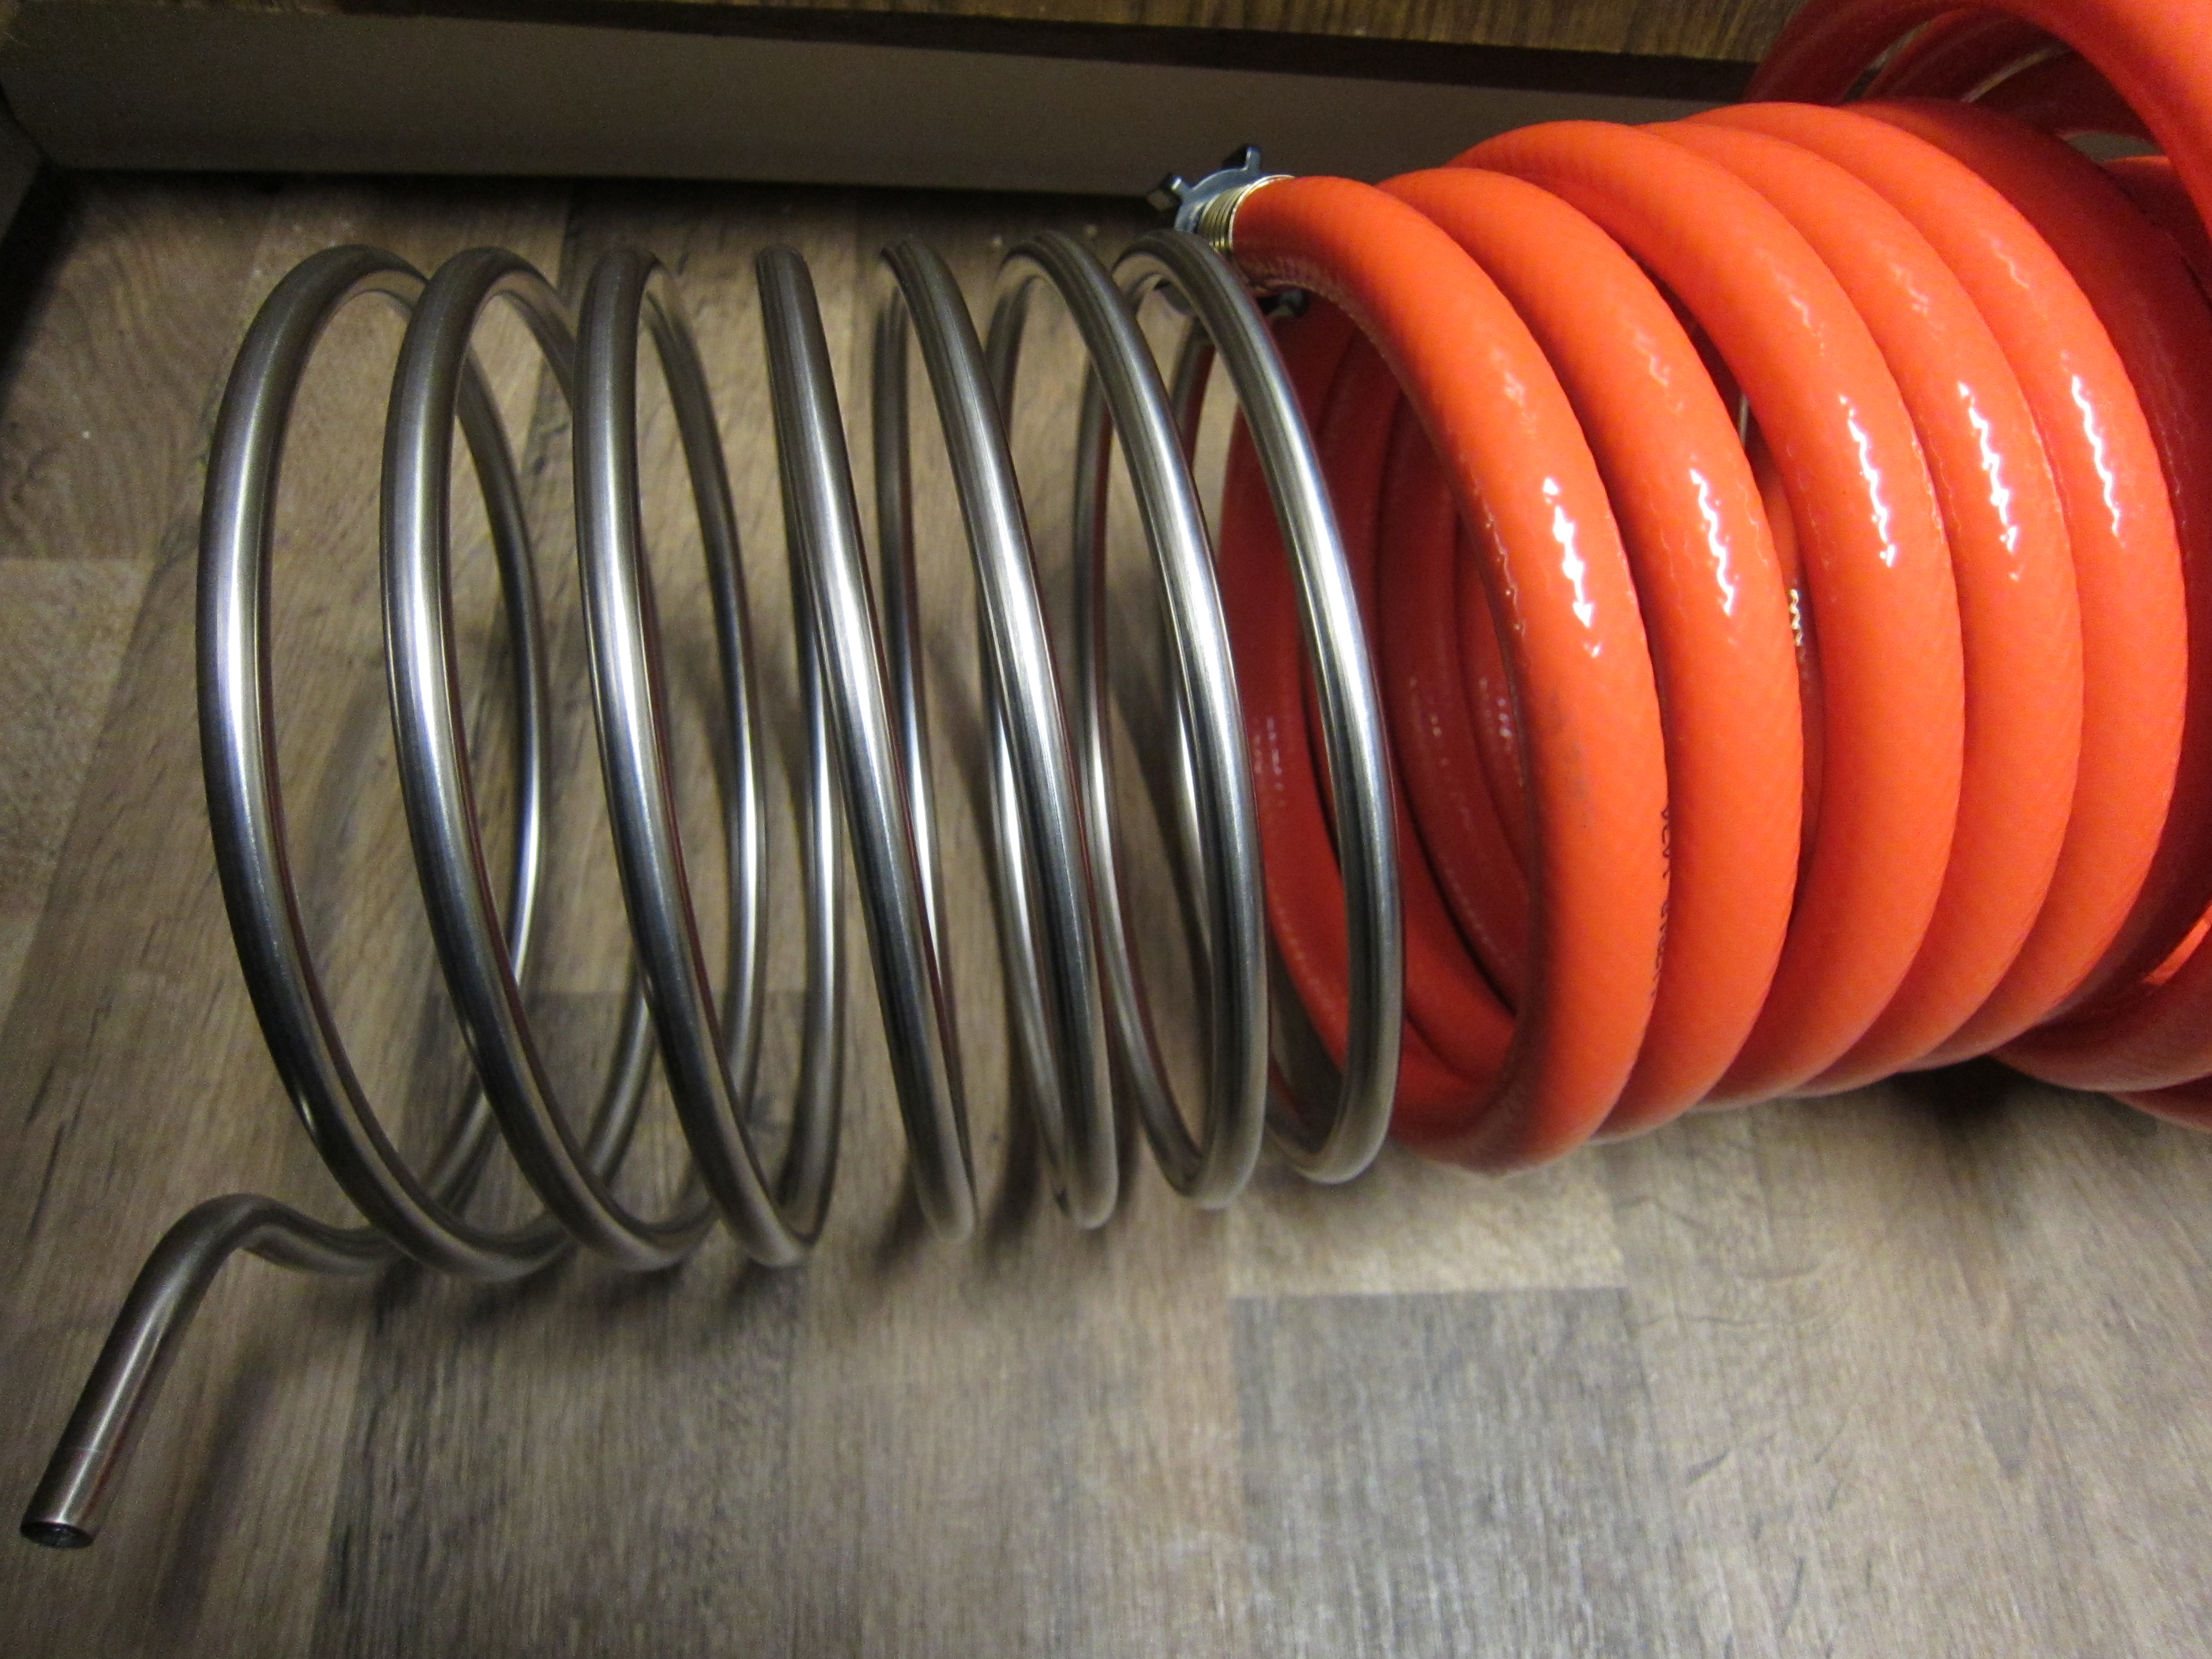
- 8″ Coil with 2 bends 25′ x 3/8″ x .035 OD Tubing 304/304L
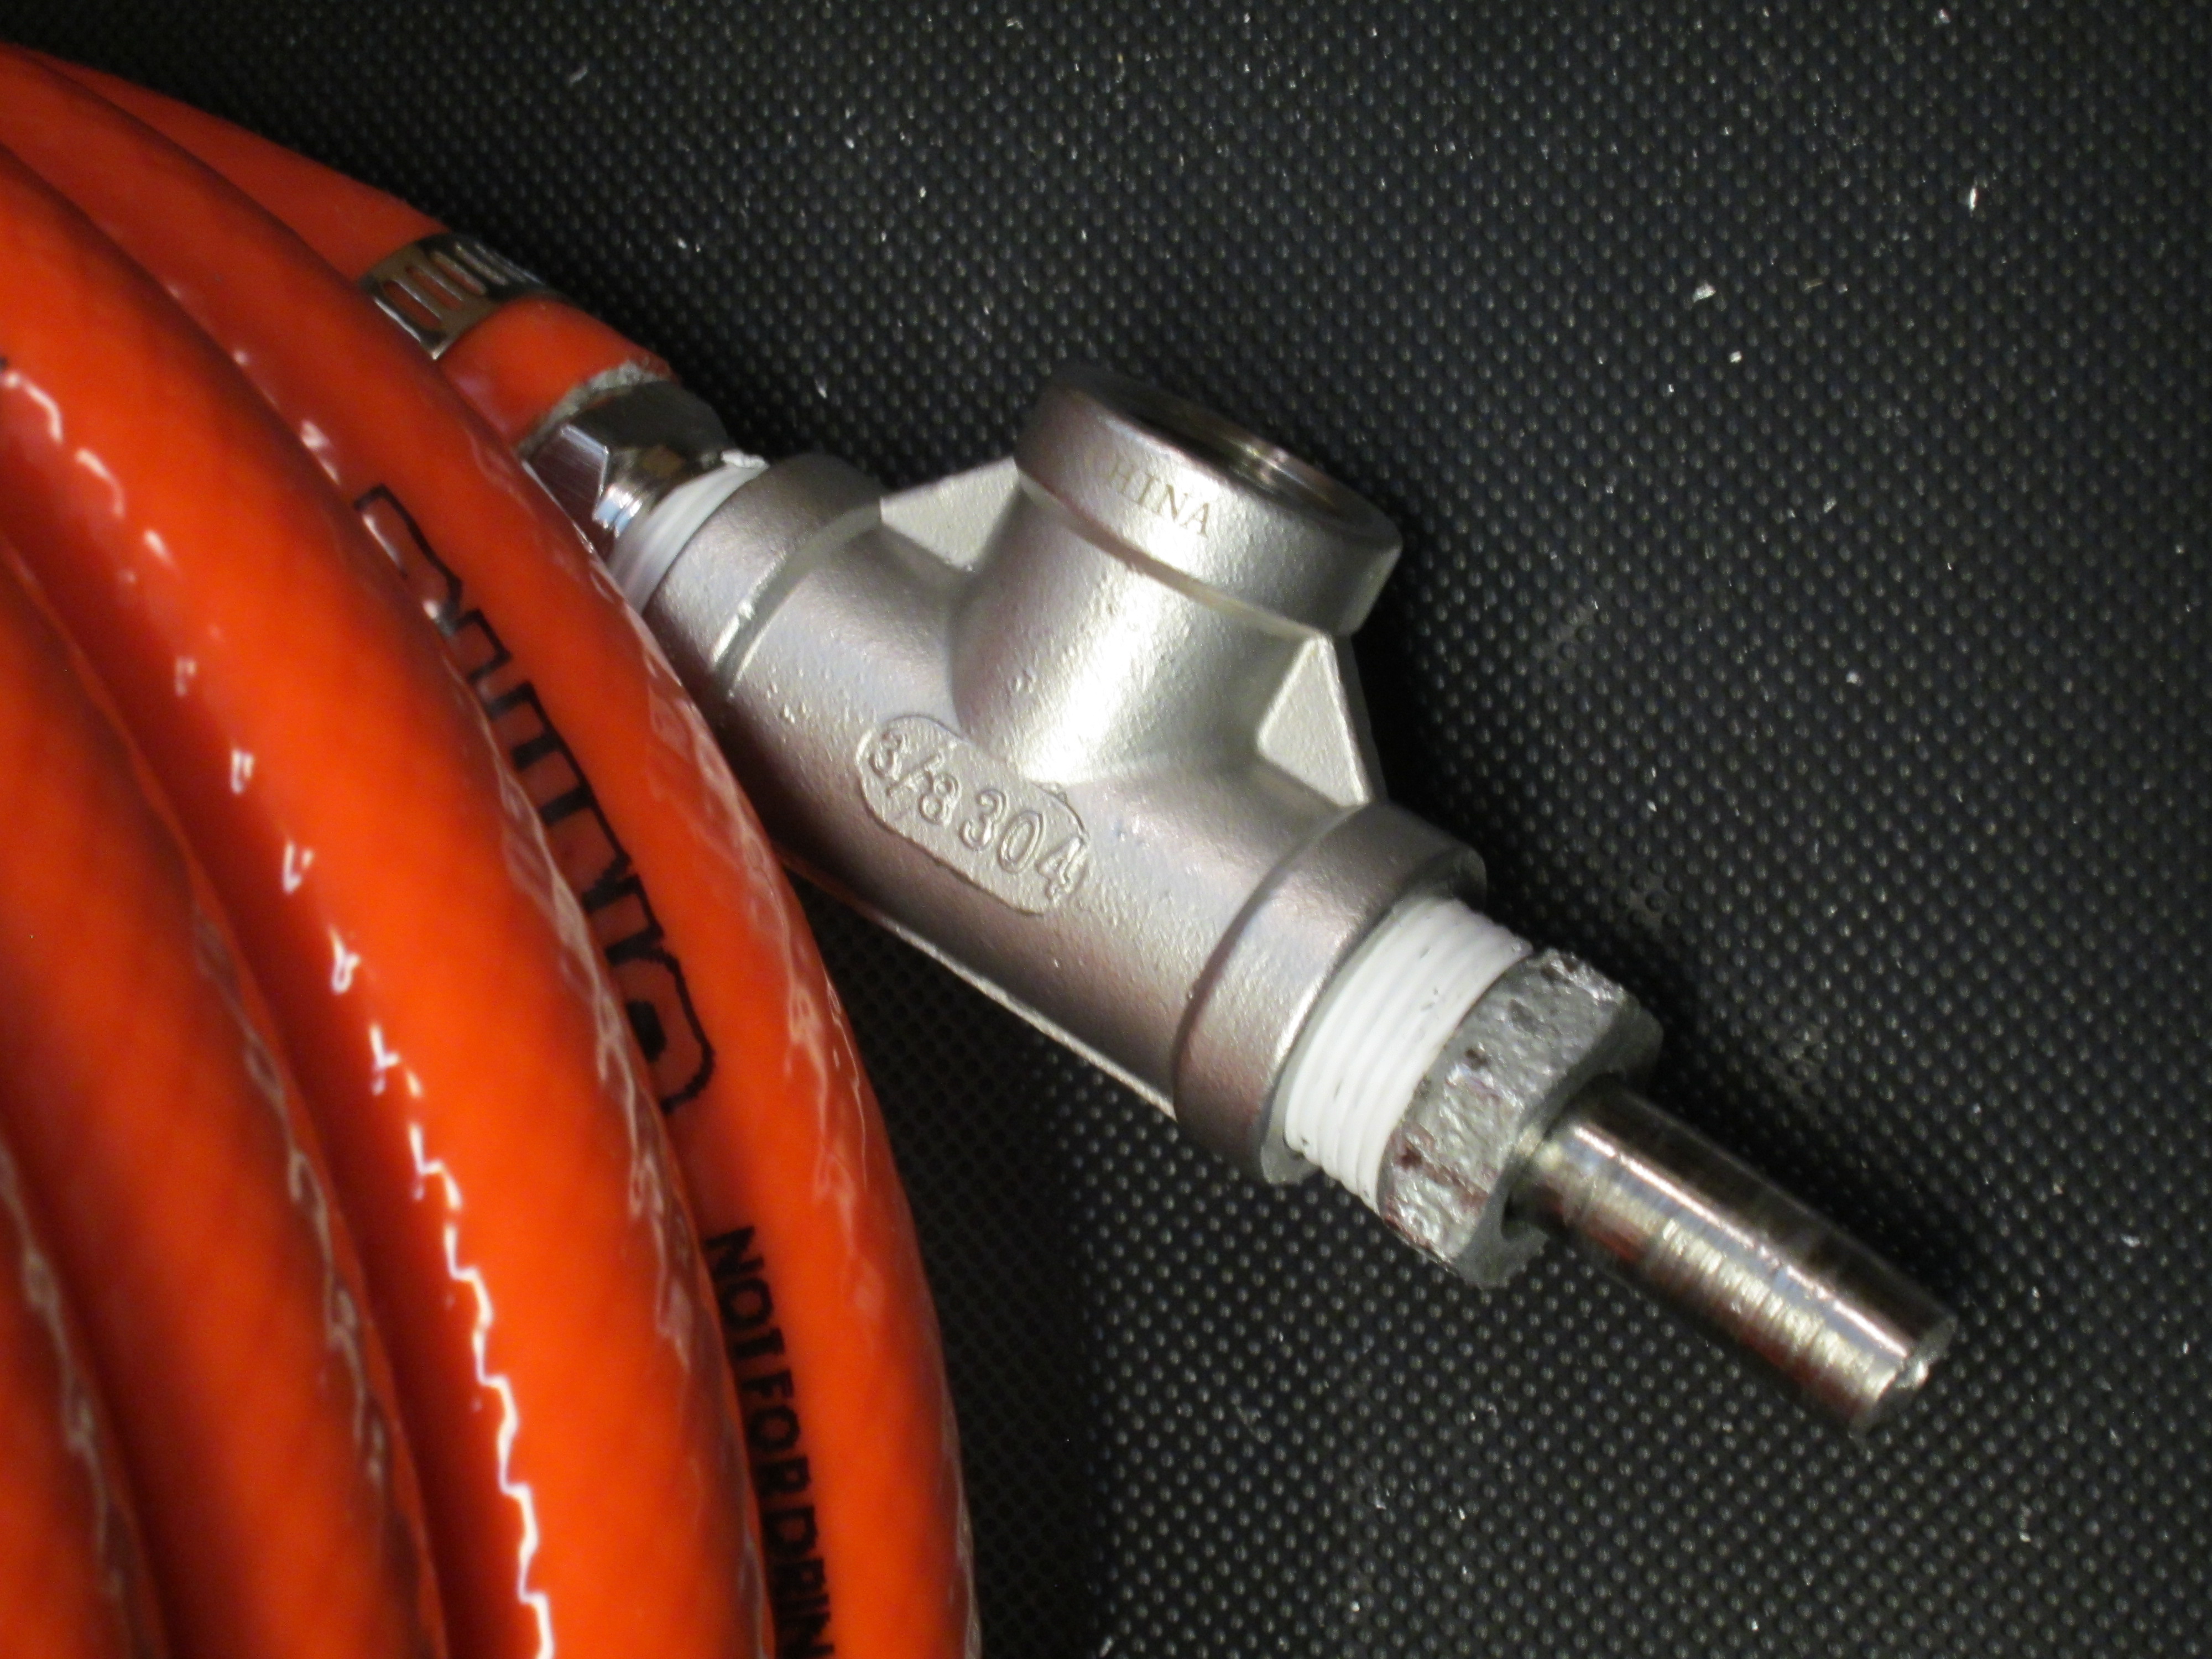
- (2) Threaded Tee, Size: 3/8″
- (2) Threaded Hex Bushing, Reducing size: 3/8″ x 1/4″
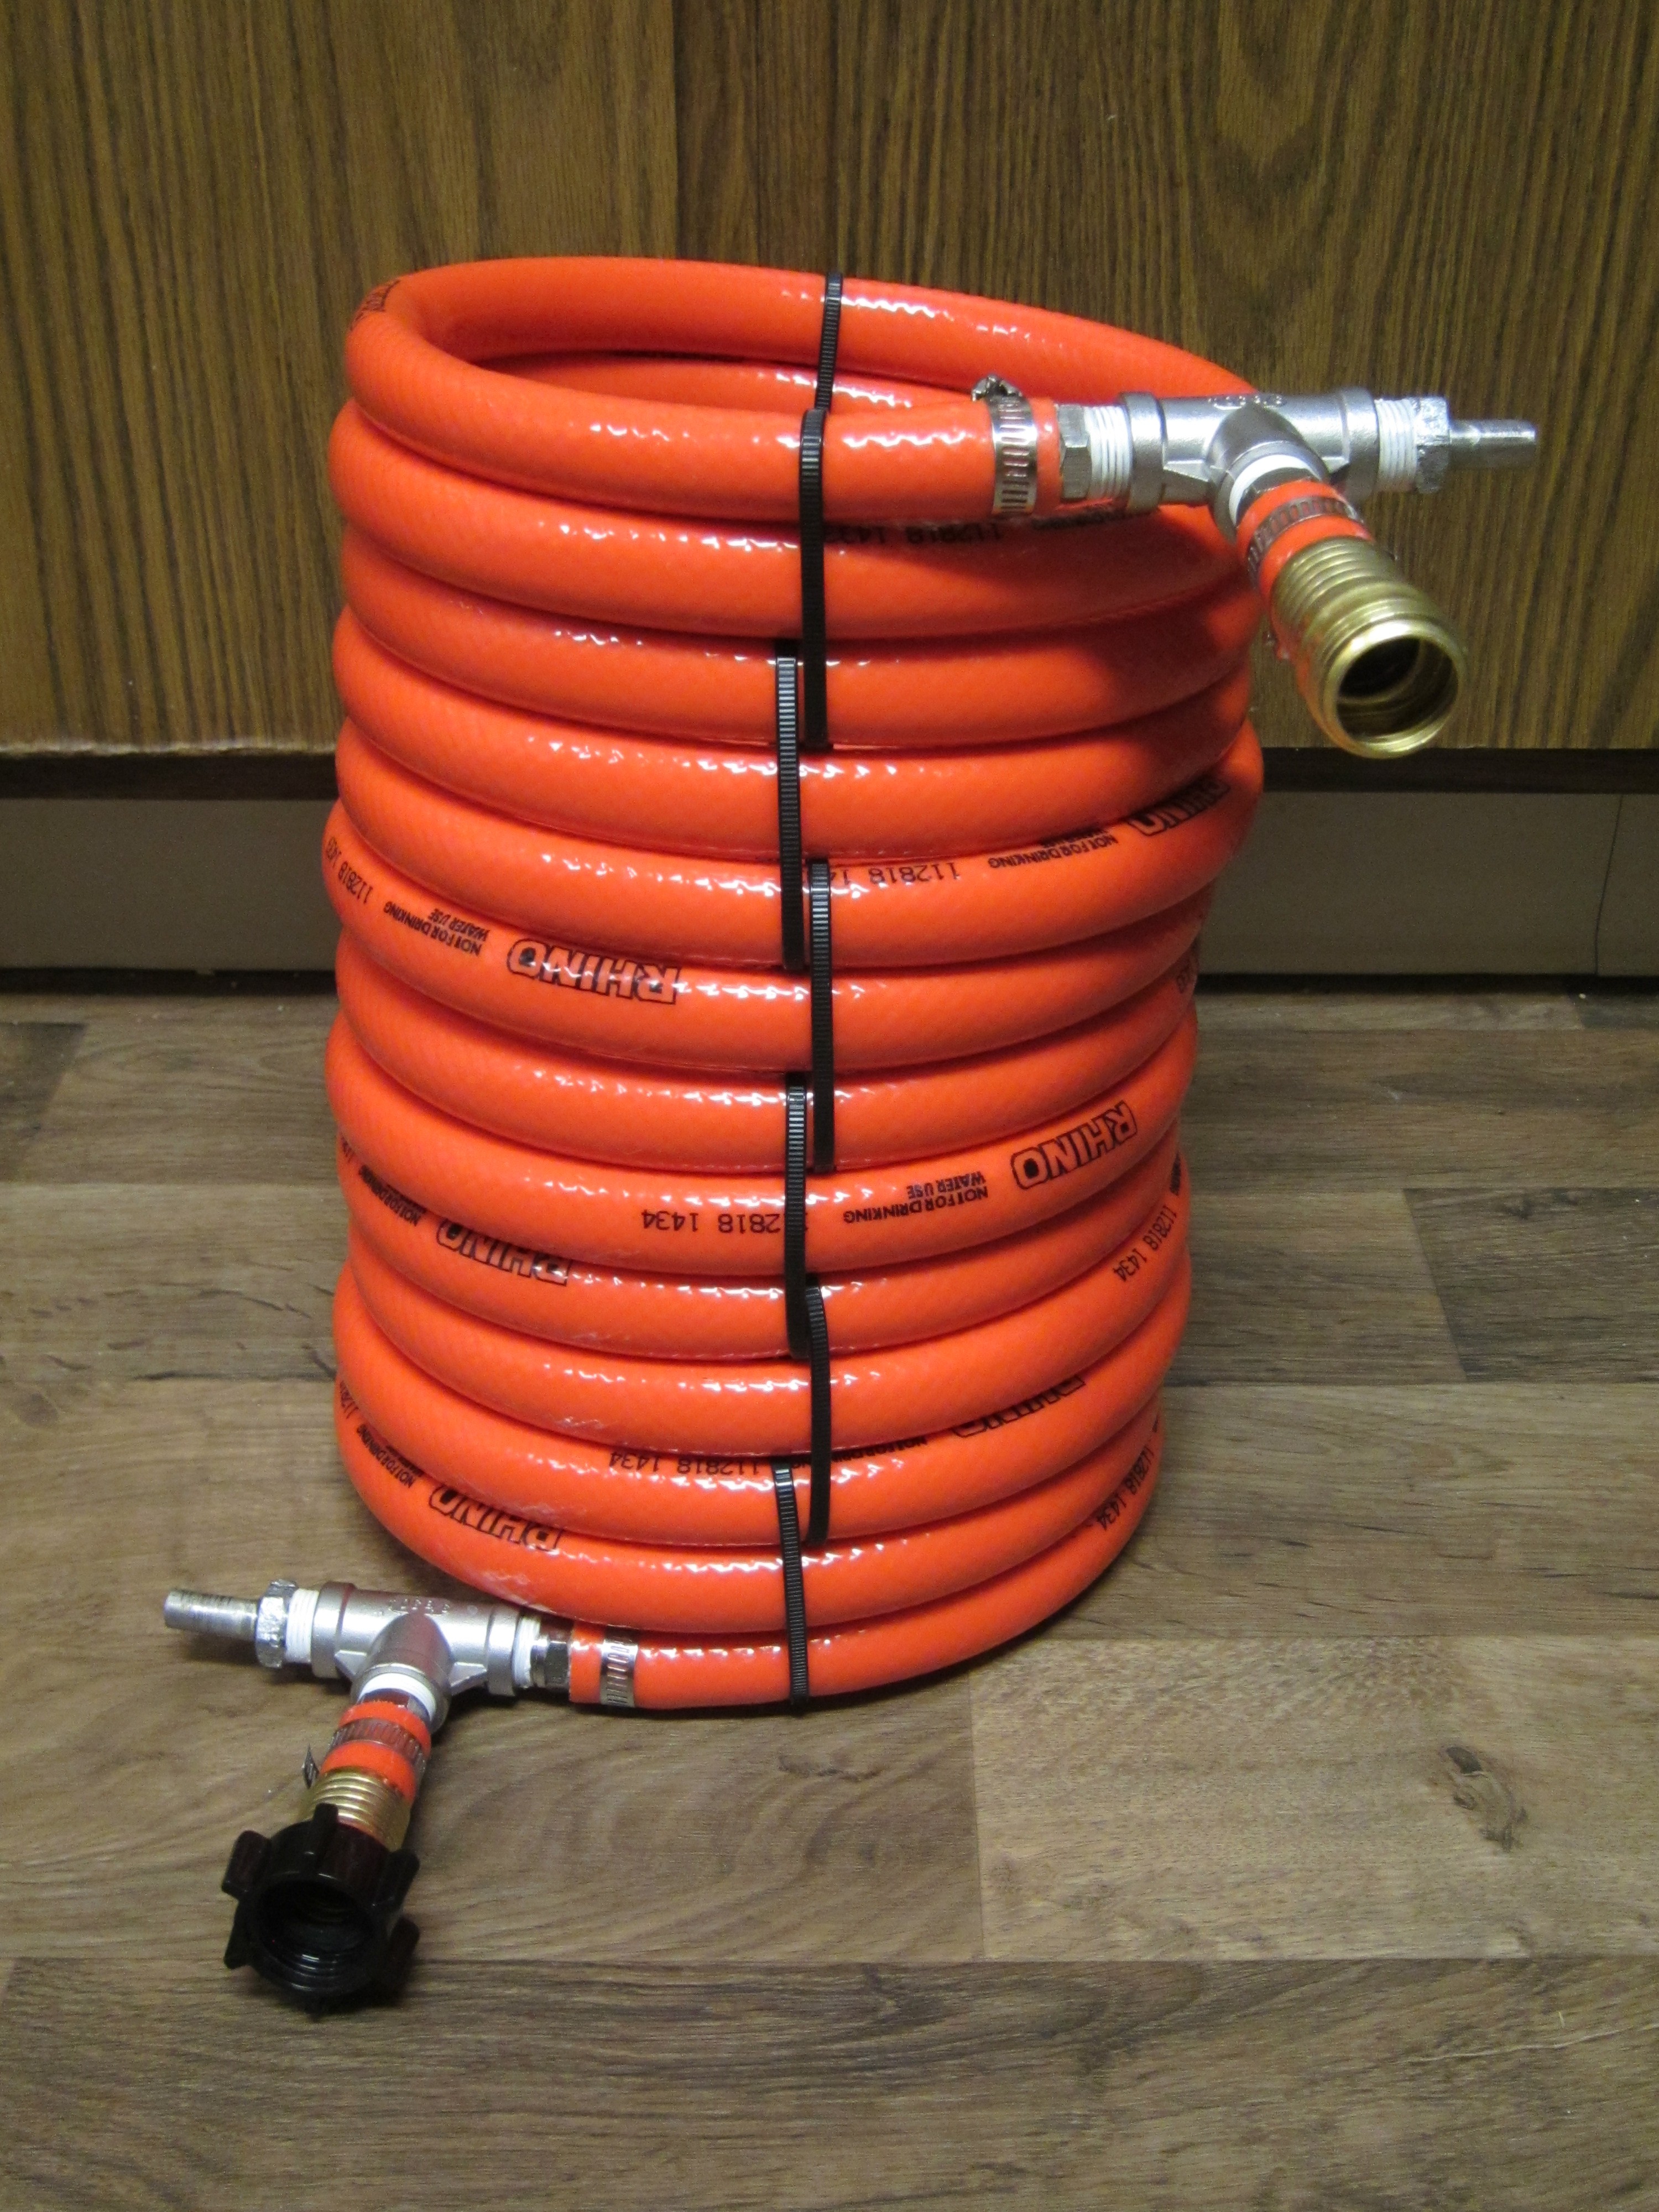
- Camco 25ft RhinoFLEX Gray/Black Water Tank Clean Out Hose 5/8″ Inside Diameter (Orange)
- LTWFITTING Bar Production Stainless Steel 316 Barb Fitting Coupler/Connector 5/8″ Hose ID x 3/8″ Male NPT Air Fuel Water (Pack of 5)[1]
- Koehler Enterprises KE10BX 10 Piece Hose Clamp Box (Size SAE 10)[1][2]
- Everflow 812 PTFE Thread Seal Tape for Plumbers, White 3/4 Inch x 260 Inch[2]
- Southwire 58298840 8-Inch Heavy Duty Cable Ties, Strong 50 lb Test, Universal Easy Zip, Black (Pack of 15)[2]
- J-B Weld 8276 KwikWeld Quick Setting Steel Reinforced Epoxy – 2 oz. [2][3]
Note that I elected to source most of the stainless hardware from Stainless Brewing; they have a huge range of fittings at prices that more than cancel out Amazon’s free shipping advantage. They also offer 0.035″ wall thickness tubing versus the 0.020″ that would typically make up an off-the-shelf immersion chiller, and while the thinner tubing would offer marginally better heat transfer, I thought a thicker wall would be better for long-term durability, what with it forming the actual structure of the chiller. The total from SB should be about $67 depending on your shipping costs, with the $43 or so from Amazon bringing the total to about $110, roughly the same as a brazed chiller of comparable surface area (0.52 m2) and the fittings needed to adapt to your water/wort connections. For the time being, lacking a clear plan for how I’ll be connecting things once the pilot system moves into the brewery, I’m sticking with 3/4″ garden hose for water and 3/8″ barbs for wort.
Assembly
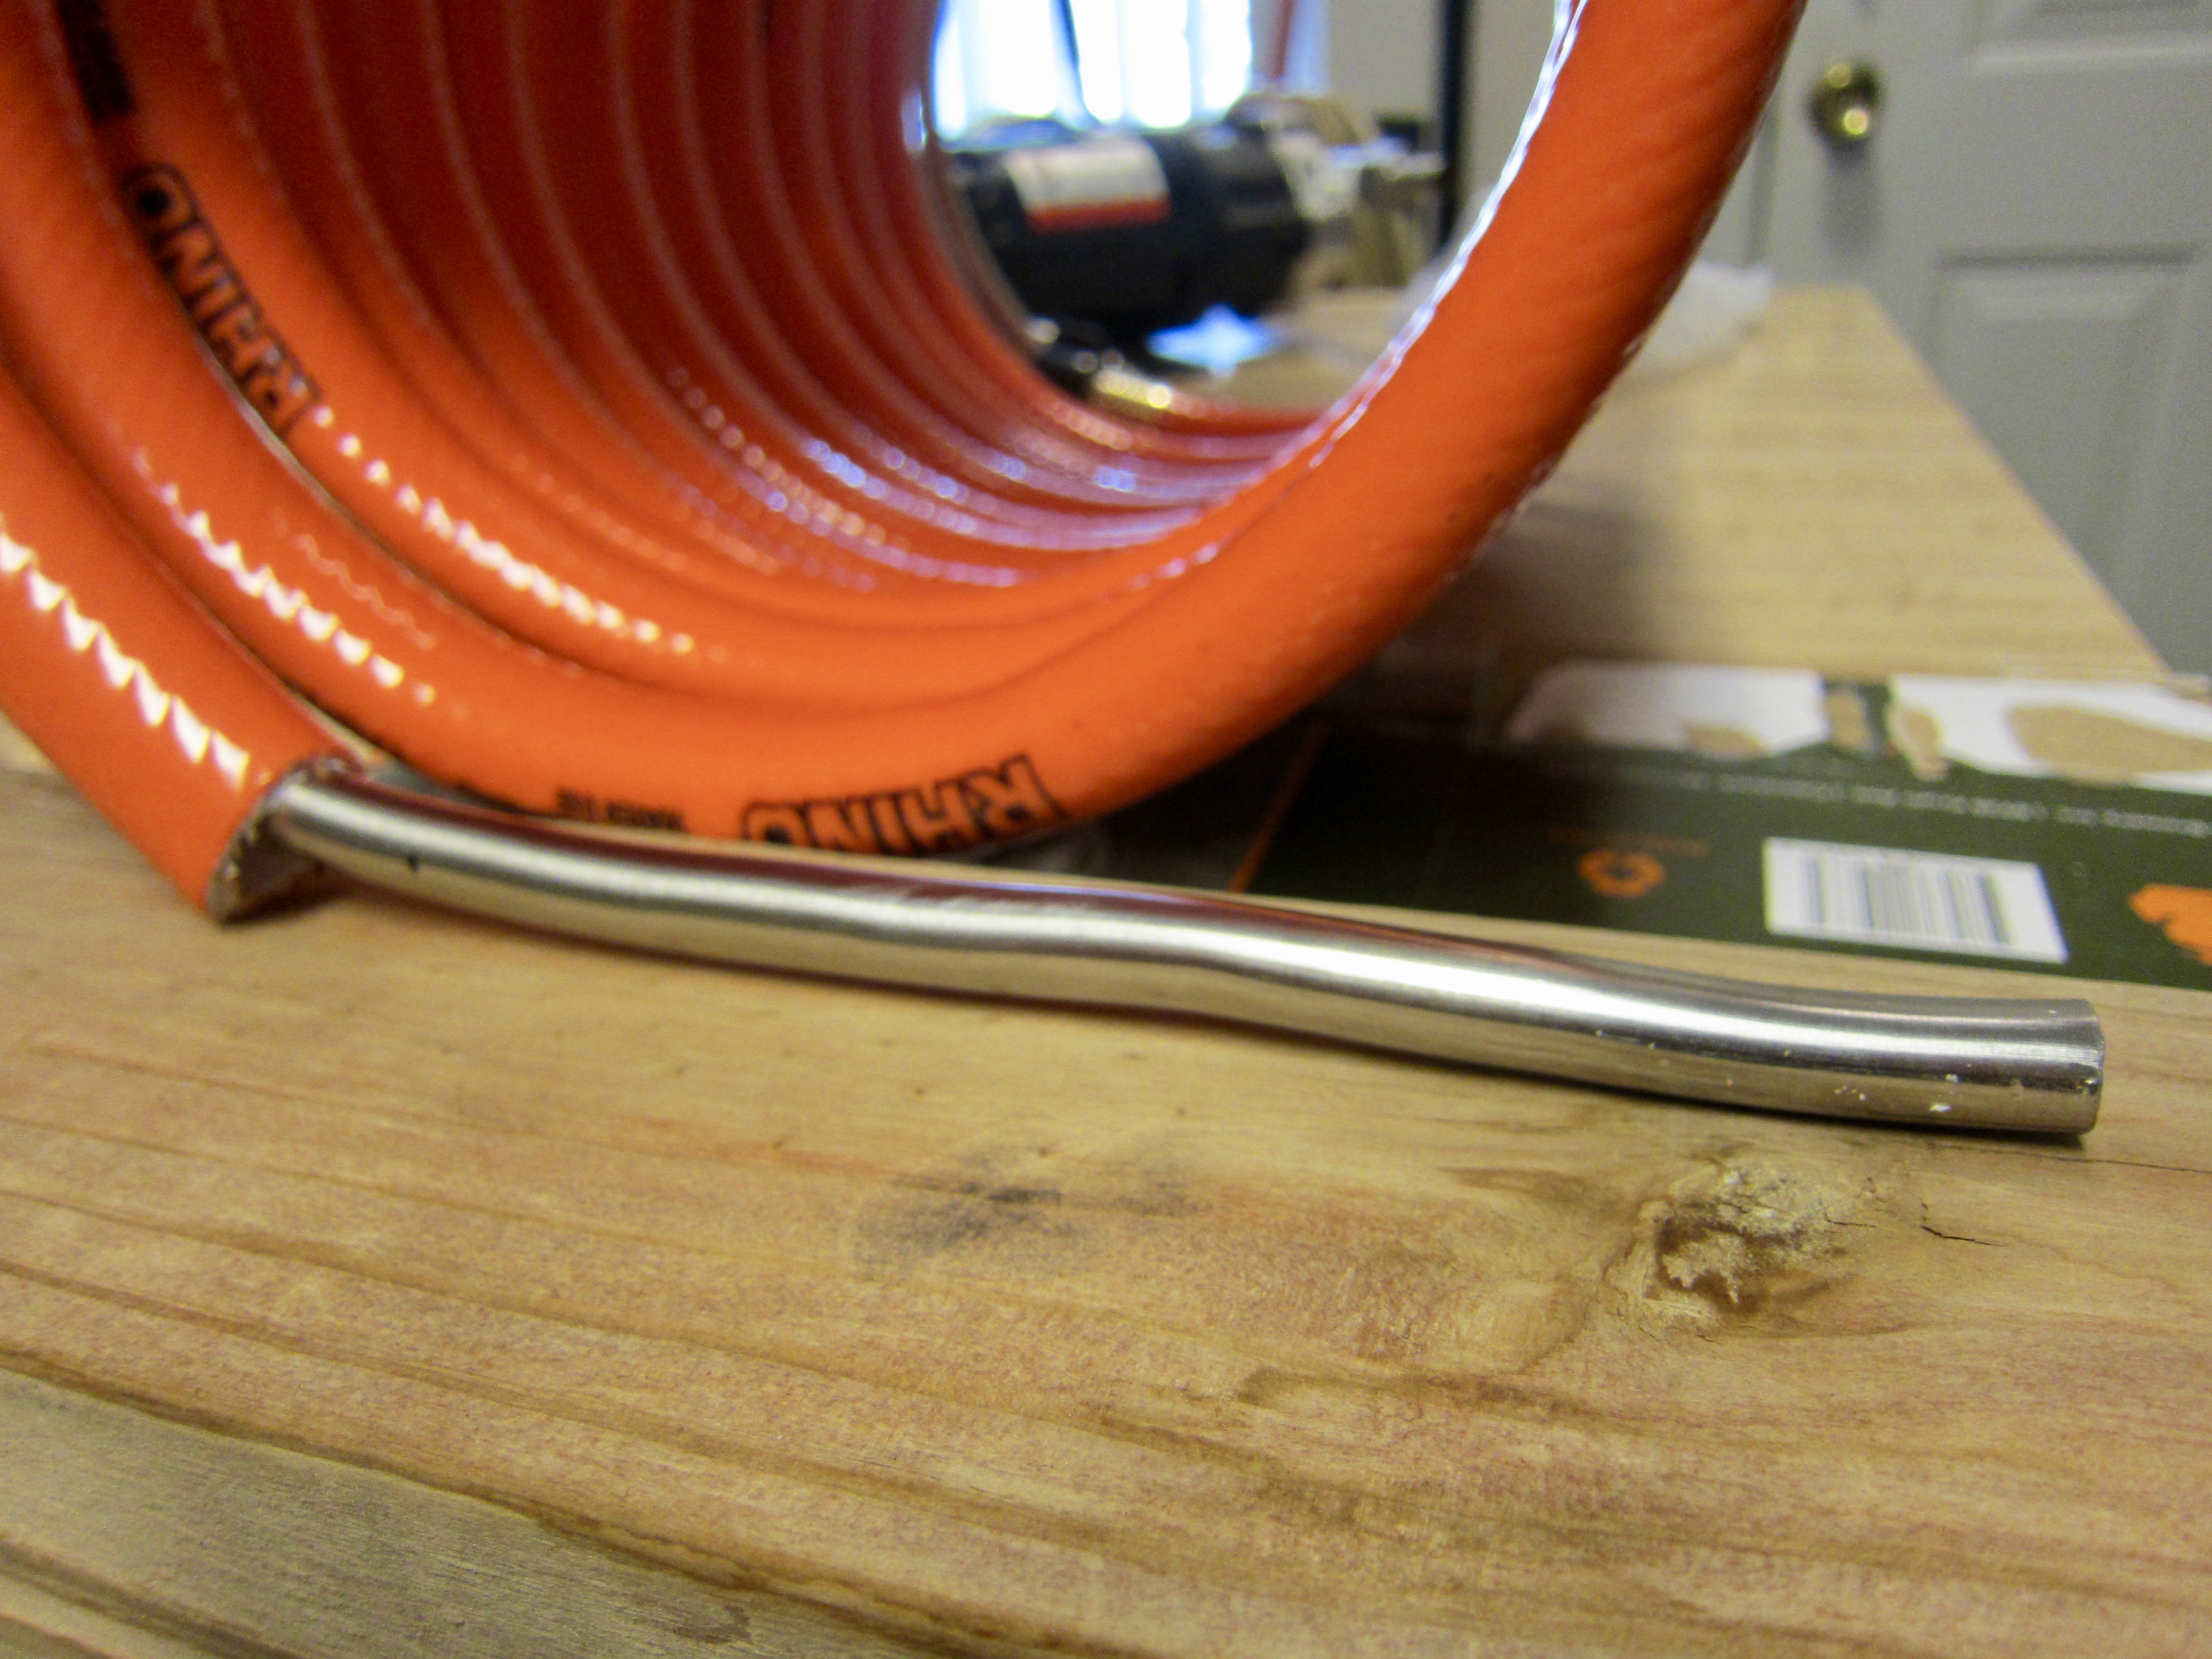
Stainless Brewing doesn’t offer an off-the-shelf 25′ coil without bends (though they do sell a 50′ coil, so I have no doubt they’d ship one as a custom order). In my case, the bends were easy enough to cut with a hacksaw and polish with a diamond Dremel bit. In fact, my tubing shipped with a full 27.5′ length, so I had to remove an entire coil at one end, leaving 25.5′ to match up with the length of the garden hose.
That done, I cut 3″ from one end of the garden hose (the hacksaw once again proving to be the right tool for the job) and started threading it onto the stainless coil — a straightforward description that belies just how physically demanding the process was. It took two hours (not counting frequent and well-deserved beer breaks), most of the skin on my knuckles, and no small measure of my sanity. I debated using some food-grade silicone lubricant to expedite things, but ultimately my obsession with neatness won out and I relied on elbow grease alone.
Cutting the other end of the hose and getting the stainless NPT fittings assembled and sealed with thread tape took just a few minutes, of course. The next task was to straighten the ends of the tubing enough to allow the fittings to slip on; once more my improbably inexpensive tubing bender was somehow up to the task, even if the final result looked a bit less professional than I would have liked.
Unfortunately, that was a far cry from the tolerances required for the compression fittings I had planned to use. My workaround for this prototype involved drilling out a pair of regular galvanized steel 3/8″ x 1/8″ NPT bushings to 3/8″ ID, but in the end they were a pain to install, seriously beat up both the mild steel and the outside of the stainless tubing, and weren’t even water-tight once it was all said and done.
So, if you’re taking on this project (and unable to weld stainless) I would highly recommend going with the parts list above, knowing in advance that you’ll have to seal the water side of the chiller with something. But at any rate, after a couple beads of epoxy[3] were applied and allowed to cure overnight, the ends of the tubing polished smooth, everything locked down tight with zip ties, checked for leaks, and ready to go, all that was left was the best part of any DIY project…
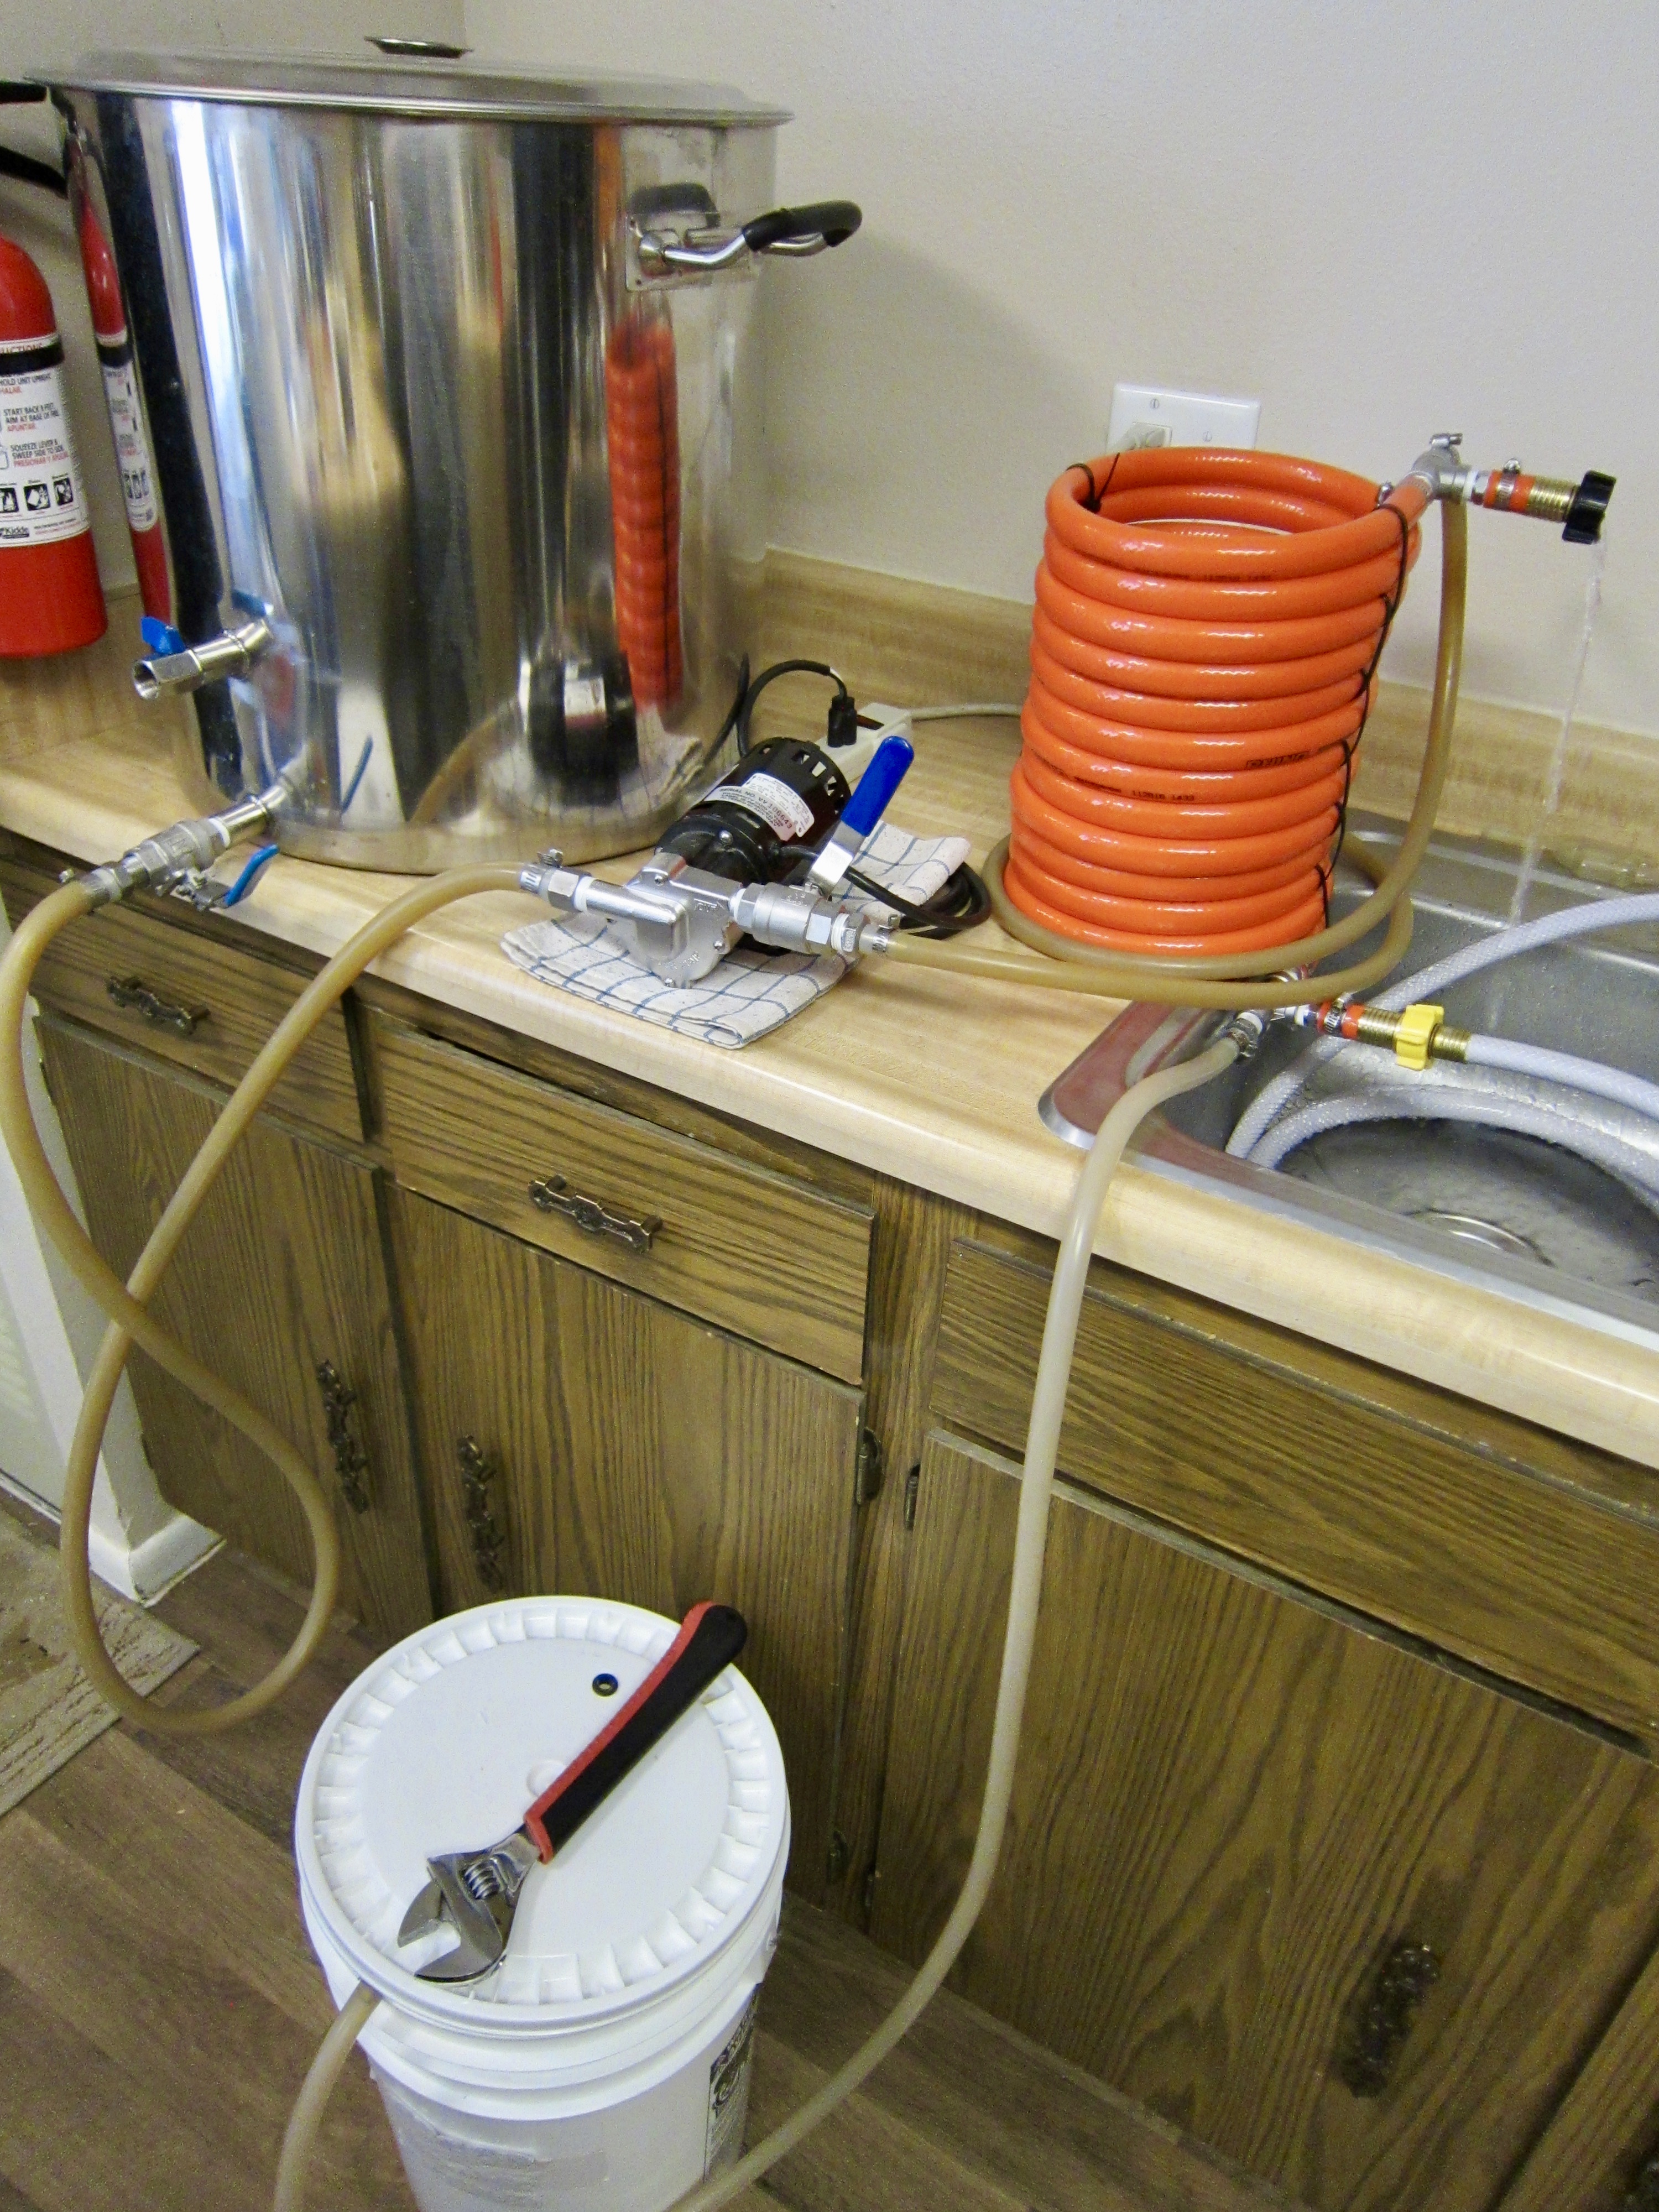
Since I would be recirculating near-boiling alkaline cleaner through the CFC anyway, I decided I could justify the water needed to run off a couple gallons and put some numbers to just how efficient this thing is ultimately going to be.
I ran two quick trials running off 1 gal of “wort” each, simulating ale and lager conditions, and the results were encouraging:
| Wort In | Wort Out | Water:Wort Ratio | Water-Wort ΔT |
|---|---|---|---|
| 89.0°C | 18.0°C | 2.3 | 12.5°C |
| 87.5°C | 9.0°C | 3.9 | 3.5°C |
It seems to do reasonably well compared to a properly-sized brewery heat exchanger (which would generally give a water:wort ratio of 1.5-2.0), but I was really more interested in how it stacks up against homebrew-scale offerings. That meant finding hard data on the performance of someone else’s design, and, knowing John Blichmann, it should be no surprise that I needed look no further than the aforementioned Therminator page. The Therminator can knock out at a 2.5:1 ratio given a ΔT of 80°C for wort and 5.5°C for the wort-water interface; by making the hopefully not-too-egregious assumption that both heat exchangers are of arbitrary length we can apply Newton’s law of cooling and determine that for the tested ΔTs of 78.5°C and 3.5°C, respectively, the Therminator could be expected to achieve a water:wort ratio of about 3.9 — bear in mind that the underlying errors are significant (±15%), but that’s statistically identical to this tube design.
On the other hand, at the 12.5°C ΔT of the ale-temperature trial the Therminator would be expected to achieve a 1:1 ratio by this approach, where it sees an actual (and still laudable) ratio of about 1.4:1. Clearly, this just indicates that the assumption of an arbitrarily lengthy heat exchanger is invalid. And in practice we know this to be true: provided an adequate water supply is available, finding an optimal knockout rate is a balancing act between thermodynamic efficiency and the more practical concern of how long knockout is able (or desired) to last. Regardless, the bottom line is that this chiller can easily knock out a half-barrel batch of ale (or lager given the right groundwater temperatures) in less than 30 min, and at the end of the day that’s all I need to know.
Notes
1. Only four of these are actually needed; the linked product was just the least expensive option I could find on Amazon.
2. Of course, you probably have some of these things on hand, or could save a little by buying them locally.
3. I used regular epoxy which, per the label, has a maximum working temperature of 200°F, which happens to be above the local boiling point. Plus I already had it on hand. For more “normal” elevations (ha!) I would strongly recommend using the J-B Weld.

Leave a Reply