This page should serve as a comprehensive introduction to the brewing process. While John Palmer’s outstanding How to Brew is undeniably useful, its length can be off-putting for someone who wants to dip his toe into the hobby. As far as I know, there is no concise online guide to making quality homebrew, as a beginner. While I do any number of things that I feel optimize the quality of the resulting brew in a substantial way, I feel it’s also helpful to have a straightforward assessment of what is absolutely necessary when it comes to producing a top-flight beer your very first time.
Before you can begin brewing, you’ll want to buy some equipment. A beginner’s homebrewing kit is probably the best way to start. These are available almost anywhere homebrewing supplies are sold; if you’re buying online, Northern Brewer sells some good ones. At a minimum, make sure your kit contains a fermenter and airlock, a siphon, a bottling bucket, some tubing and a bottling wand, a capper and caps, a hydrometer, and sanitizing solution. If you don’t already have a large (5 gallon or more) pot, that’s also a valuable purchase.
The brewing process can be regarded as consisting of seven distinct operations:
- Malting
- Mashing
- Boiling
- Chilling
- Fermentation
- Conditioning
- Packaging
In practice, though, homebrewers don’t malt their own barley, and almost always condition in the “package”, and so there are effectively five steps.
0: Prep
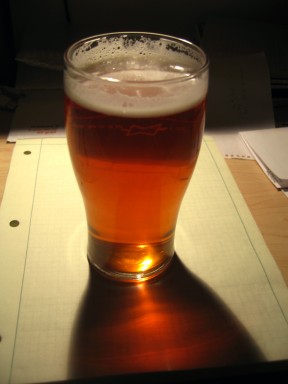
OK, I lied. But the simple fact is that many of the important brewing operations take place in the week or so prior to brewday. The most important is probably formulating a recipe, followed by taking inventory of ingredients and supplies. Recipe formulation is straightforward, but also complex enough to be intimidating the first few times. The people at your local homebrew supply shop (LHBS) should be happy to help. And if they aren’t, why shop there? Unfortunately, some otherwise well-meaning LHBS employees are either misinformed, or simply behind the times. The good news is that there are any number of world-class brewers online, dispensing free advice. I’ve found the Northern Brewer forums invaluable; you can also find many of my recipes on this site, and of course, email me with any questions. If this is your first time brewing, I have a tried-and-true American Amber Ale recipe that I recommend.
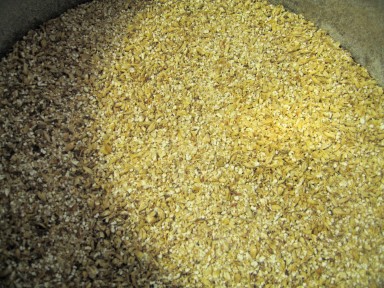
So, now that we have a recipe, it’s time to check our ingredient inventory. For brewers who keep relatively large amounts of their ingredients on hand (more than are required for a single brewing session) this can be done just before brewing, but otherwise it will require a trip to your LHBS, or an online order. Whoever your supplier is, make sure they mill, or crush, your grains. You can do this yourself with a rolling pin, but believe me, it’s no fun. The ingredients you will need (in truth, the only ingredients there are) are:
- Malt (and malt extract): The quantities and types will depend on your recipe, but they should all be in stock at your supplier. As a beginner, I’d suggest you buy only unhopped dry malt extract (DME), in the lightest color available.
- Hops: Again, your LHBS should stock a wide variety, and will advise you on what to include in a recipe.
- Yeast: This will be either dry (recommended for beginners) or liquid brewer’s yeast, NOT baker’s yeast. Freshness is key, so check the date on the package.
- Water: Generally, if your water tastes good, it will make good beer. Extract already contains the necessary minerals, though, so you’ll want to replace about 50% of the water, or 3 gallons, with distilled water from the supermarket. Avoid using tap water from a water softener if possible.
With a few rare exceptions, you should not buy pre-packaged commercial ingredient kits. These may include sub-par ingredients to begin with, and are rarely fresh. Don’t forget to check up on your other supplies too – do you have enough priming sugar (or CO2)? Bottles and caps? Sanitizer?
Finally, do you have enough yeast? If you’re using dry yeast, then one pack (two for very high-gravity beers) is enough. Lagers will require double that amount. If you have liquid yeast, though, about 4 days before brewing it’s time to make a starter. Homebrewing demigod Jamil Zainasheff has a fantastic resource for all things yeast, including instructions for making starters, at MrMalty.com.
1-2: Malting and Mashing
Malting is the process of moistening grains in order to start germination, then applying heat to stop it. This produces enzymes in the grain which are capable of breaking its starches into the sugars that the seed would need for food. Since we want to make beer, not grow plants, we’re going to co-opt those enzymes and use the sugars they produce to make yeast food instead. In the case of malt extract, the manufacturer has done this for you, mashing the malt so that the sugars can be used immediately. Any cereal grain can be malted: barley is most common, but a well-supplied shop will also have malted wheat, rye, or (rarely) sorghum, should your recipe call for them. When buying your grains, make sure to specify that you want the malted versions. Using only unmalted grain will make mashing impossible.
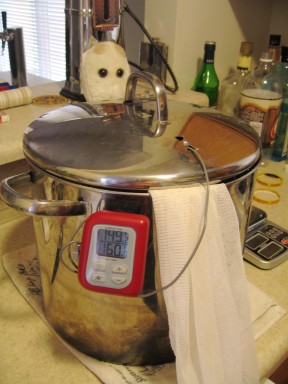
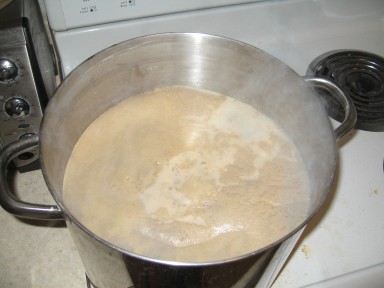
The procedure we’re going to be using is a mini-mash, sometimes (and somewhat erroneously) called partial mashing. It adds about 45 minutes to your brew day, but saves some money and noticeably improves the beer. Begin by heating tap water in your largest pot. The amount of water will depend on the amount of grain: you want to use 4 L per kg (0.5 gal per lb). While the water is heating, place your crushed grains in a mesh grain bag (available at your LHBS) and loosely tie it closed. Once the water reaches 73°C (163°F), remove it from heat and add the grain bag, dunking as you would a tea bag until all the grains have been thoroughly soaked. The water should begin to change color almost immediately, and the temperature should stabilize at about 68°C (154°F). In all-grain brewing, this temperature is of critical importance, but for our mini-mash a difference of a few degrees won’t matter. Cover the pot and set it on top of a towel so that it doesn’t lose too much heat. If you prefer, you can put it in the oven on the lowest heat setting. Let it sit for one hour. You’ll want to use this time to heat a second batch of tap water of the same volume, to a somewhat higher temperature, about 75°C (177°F).
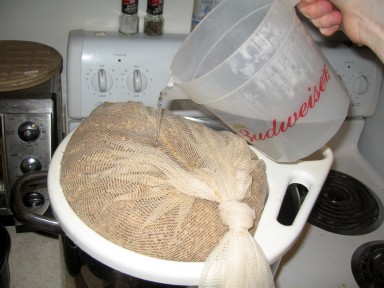
Once the hour is up, we’re ready to sparge. Uncover the pot and place the grain bag in a colander or screen, resting on top. Slowly pour your second batch of hot water over the grains, letting them drain into the pot. You’ll end up with 10-15 L (2.5-4 gal) of sweet wort. Try it, it’s delicious! Ideally, you want to start with about 6 gallons (23 L) of wort. If your pot will hold more and your stove can boil more, add distilled water until it’s almost full, making sure to leave several inches at the top so that it won’t boil over. If you can’t fit a full 6 gallons, don’t worry about it. Freeze the extra distilled water the day before you brew, and we’ll use it to top off later.
3: Boiling
Now the fun starts. Put the wort on high heat until it comes to a boil. A thermometer with an alarm is very handy here, since it will notify you just before the boil starts. Starting at about 95°C (203°F) you need to watch the pot (don’t worry, it will boil). There are as many techniques for avoiding a boilover as there are homebrewers; the best solution, of course, is to have a pot much larger than your boil volume. 10 gallons is generally considered safe for a 5-gallon batch. If you aren’t lucky enough to own a 10-gallon pot, just keep an eye on it. Reducing the heat for the first few minutes of the boil can help, as can stirring. If it does boil over, don’t try to continue the boil, just clean your stove immediately. Trust me.
Once the wort has been at a rolling boil for a minute or two, it’s time to start the timer. Your recipe will probably call for a 60-minute boil, with your first addition of hops also at 60 minutes. Some homebrewers like to put the hops in a hop bag (like your grain bag, but with a finer mesh) but there’s certainly no harm in throwing them directly into the boiling wort. If you have a 60 minute boil and your next addition is at 15 minutes, you have 45 minutes to kill. Use it to sanitize your fermenter, using Iodophor or Star-San; either will be available at your LHBS. If you’ve read an older brewing text it may recommend using bleach to sanitize, but the modern products are cheap, more reliable, and readily available. You’ll want to sanitize your fermenter, the lid if it has one, the stopper and/or airlock, and your colander.
When there are about 15 minutes left in the boil, remove the pot from the stove, and stir in the extract, then bring it back to a boil. Stir thoroughly (it’s OK to take a couple minutes) to make sure extract doesn’t get burned on the bottom of the pot. This is especially important if you’re using liquid malt extract (LME). Also, be careful – depending on how much extract you’re using, there may be a second boilover. Continue to add hops as the recipe directs.
4: Chilling
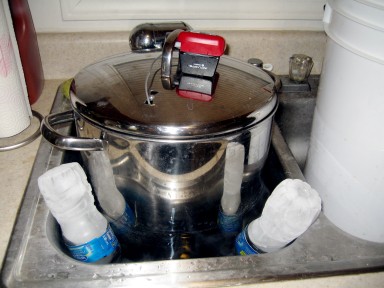
The goal here is to take your wort from boiling to roughly room temperature as quickly as possible. Once the hop additions are done and the boiling time is up, remove your pot from the heat, cover it, and immediately begin chilling. If you weren’t boiling the full volume to start with, add your frozen distilled water right before putting the lid on. Next you’ll want to immerse it in a sink or bathtub full of cold water, and ice if you have it. Stir the water around, and if it starts to feel warm replace it with new, cold water. Remember, you want to chill as quickly as possible, but it may take as much as an hour. Leaving a thermometer in the pot can be very helpful. The wort needs to be below 20°C/68°F. 17°C/63°F is better. This assumes you’re doing an ale; lagers need to be chilled to 10°C/50°F, which is why they aren’t generally advised for beginners. Once the wort is cool, pour it through the sanitized colander into the fermenter, trying to leave most of the gunk in either the pot or the colander. If you still don’t have a full 5 gallons, top off one last time with pre-boiled water.
5: Fermentation
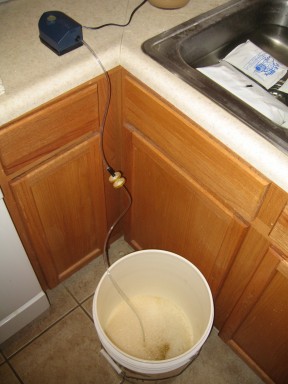
Once the wort is cool, it’s time to aerate. Seal your bucket lid, or put the stopper in your carboy, then shake it for about five minutes. The soon-to-be beer will foam up like crazy, and then you’re ready to add the yeast. If you’re using liquid, carefully pour off most of the liquid at the top of the starter (putting it in the refrigerator overnight will make it easier), then swirl up the solids at the bottom and pour them into your fermenter. If it’s dry yeast, the package will probably have instructions for rehydrating it. The jury is still out on exactly how beneficial rehydration is – for your first beer, just open the packet and dump it in. Seal up the fermenter and fill the airlock with water. Keep it somewhere away from light, at 16-21°C (61-70°F).
After 10 days, take a gravity reading using the hydrometer that came with your kit. You may have a specialized tube for doing this, but you can use any food-safe kitchen vessel. Either way, sanitize it before using it, and don’t pour the sample back – after all, this is your first chance to taste your beer. The gravity will be 1.0XX, where the Xs are two digits that brewers commonly call “points”. A final gravity will almost always be between 5 and 20 points. At 14 days, take a second reading, and continue taking readings every three or four days until they stop changing.
6-7: Conditioning and Packaging
Now it’s time to bottle or keg. If you’re kegging, well, you’re lucky, but you probably don’t need this guide. For the rest of us, sanitize your bottling bucket, siphon, tubing, bottling wand, and enough bottles and caps to hold the beer (about 52 for a 19 L/5 gal batch). While that’s all soaking, boil about a cup of water, remove it from heat, and stir in the priming sugar. A table like this one will tell you exactly how much to use for a given style, but about 125 g (4.5 oz) is the average. LHBSs tend to sell packets of sugar in this quantity if you’re so inclined. Let the water cool to about room temperature, then pour it into the bottling bucket. Using your sanitized siphon, transfer, or “rack” the beer on top of the sugar solution. Stirring with a sanitized spoon can help to get the two liquids thoroughly mixed, but avoid splashing or doing anything else that would let air get to the beer. Attach the tubing and bottling wand to the spigot, and you’re ready to fill bottles. I like to work in batches, filling 4-6 bottles at a time before I crimp the caps. Now all that’s left is to leave the bottles in a warm, dark place for about two weeks, until the beer carbonates.
8: Drinking
Did I say all that’s left? I guess I’m a liar twice over. You made beer, so drink up! You’re now part of a tradition stretching back thousands of years, to the very beginnings of agriculture, and an occupation that has fueled man’s greatest atrocities, and his most transcendent works of art. As you imbibe, take time to reflect on the fact that you’ve harnessed the forces of nature, indeed, of life itself, and in doing so in some small way left your mark on the world. Above all, remember to enjoy the fruits of your labor. Savor your homebrew, but also remember that you can always make more. Beer is best enjoyed in the company of family and friends.
Cheers, and happy brewing!

I moved this from a page to a post to remove categories and condense the navigation bar a little. The old URL will still redirect, but if you have links/bookmarks you should probably update them.
[…] batch, from all the way back in May 2008. I used the opportunity to take some pictures for the Good Beer, Easy Beer tutorial, mashing in a grain bag, so my efficiency was only 55%. I’m going to add sugar for a […]